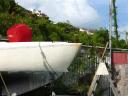
The bowsprit is finally on! Installing a ‘sprit on Centaurea was always on my big list, my most wanted.
Bowsprits are usually subject to strong personal preference and opinions. Some people love ’em, others despise them. While I could have gotten away without one, I had compelling reasons to make the addition. A short ‘sprit was a factory option on several production runs of my boat, largely as a means to shift the center of effort forward. Several other owners I’ve been in touch with claimed somewhat unruly weather helm with a ‘spritless sailplan, so seeing as I was completely re-rigging anyways, it seemed like a good idea to add the ‘sprit to help with that. Many other owners have had the same idea; I’ve seen fewer pics of L32’s without than with.
Another reason for a ‘sprit is to provide a decent tack position for an asymetrical spinnaker. Now, I don’t yet have one of these sails, but on other friend’s boats (of varying makes/sizes), I’ve seen them wrestle with adding such sails without the benefit of a decent tack placement. They usually have to screw around with inboard (improper) tacklines, or pennants off the anchor rollers, etc. One other practical reason for a ‘sprit: a place to mount anchor rollers and such. The existing bow platform was a real tank, an ugly lump of steel and teak that weighed more than the new all-steel ‘sprit. The last reason I had for the addition was an emotional one: I just like bowsprits!
Typically, a ‘sprit requires at least three supporting pieces of wire to hold it in place: a bobstay to hold it down, and a pair of whiskerstays to keep it centered. My plan was for an A-frame unit; this makes for a wider, more secure working platform, and removes the requirement for the whiskers. Additionally, I mounted the anchor rollers alongside the legs, rather than forward as is usual with most wide ‘sprits. This gets the anchors further aft, for better weight distribution and handling. On the downside, it looks funny. Well, it’s a funny-looking boat! This is one area where practicality and strength trump style any day.

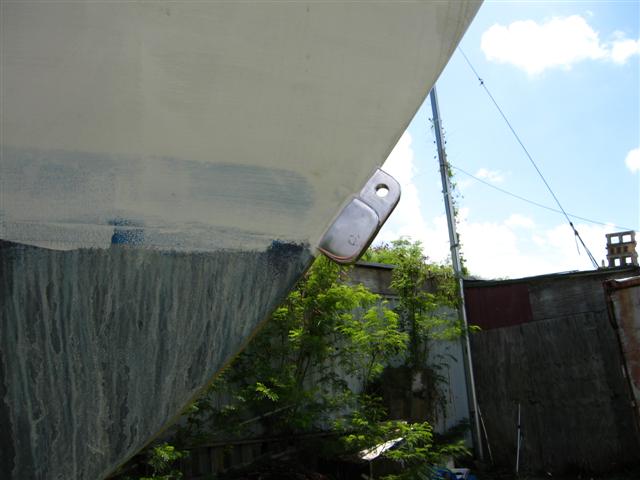
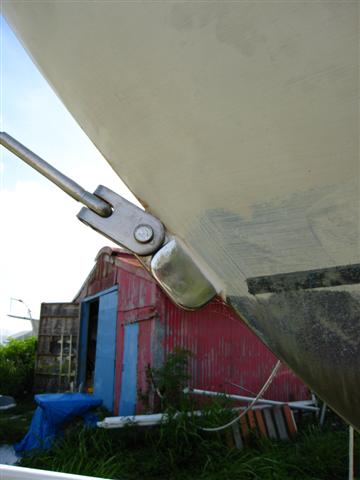
Here is the stem fitting that holds the bobstay to the hull, before and after fitting the rigging. The fitting is unusual. Unusually stout, that is! The piece is CNC’d from a 1″x2″x4″ block of stainless by a friend in California. Two 1/2″ and one 3/8″ stainless bolt pass through the hull and blind-thread into the piece from behind. The final shape of the fitting is different from what I was at first envisioning, but again, strength won out over aesthetics.
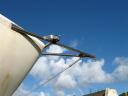
I had at first wanted a radius on the end of the ‘sprit, ideally to match the radius of the stemhead. In the end, however, I was constrained in several key areas: I had to work with the materials and tools at hand, and strength and function (of course) was the priority over looks. If I’d had access to some stainless pipe sweeps, a proper bender, or heck, was just rich enough to get someone else to fab the whole thing, I would have done it differently…
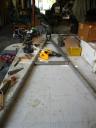
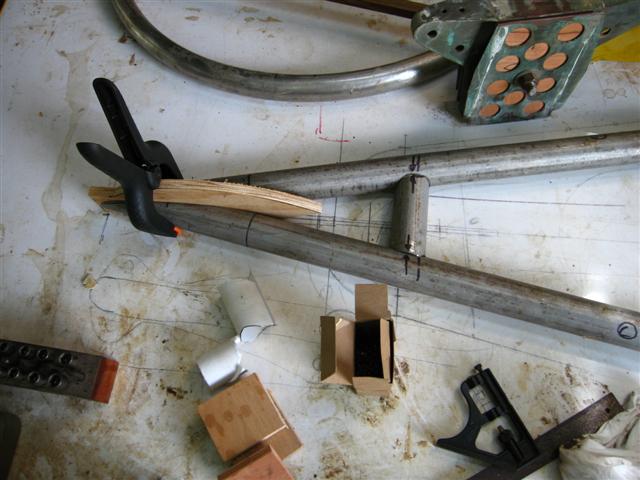
Here is a shot of my table in the shop, during the initial layout of the metalwork. I drew a full-scale plan of the stemhead on the table to help with the visualization. I left the long legs run long to fit later. In fact, I had the whole outboard end polished and welded before cutting the extra length off and fitting it to the boat. Of course, there’s also plenty of scrawled “alternative versions” on the table too…

Here’s another view. I’d never cut these sorts of angled birdmouth pipe joints before, so I was kinda making it up as I went. The slit toiletpaper roll is a guide for tracing the cutline. The plywood clamped in place is in lieu of the as-yet-unbuilt tang plate. You can see a tracing on the table surface ofe one idea for the tangplate shape. The hoop at the top of the pic is the boomkin, also under construction. You can also see the green bronze masthead sheavebox in the upper right, cut apart for widening, then clamped back together with plywood spacers, awaiting re-fastening.
By doing all the layout, fitting, cutting, grinding, pre-polishing, and final polishing myself, and just getting a welder to simply weld the pieces, I saved substantially. I salvaged the stainless tubing for free, and my bill from the welder was under $550 with his materials… A similar, if slightly larger A-frame a friend had fabbed and welded cost him $600 in materials and $1900 in labour!
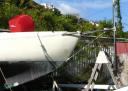
 Here is another view from the ground. The unusual axe-shape of the tangplate wasn’t by design; rather, after drawing out several “prettier” solutions, this shape was simply the easiest to cut out. The clear 16″ between the two tangs on top of the plate is to allow plenty of room for both the jib furler and my free-luff Code furler. The most forward tang below is for a block to redirect the anchor snubber line, keeping the rode clear of the bobstay.
I plan to knot up a burly net to “fill in” the middle of the A-frame, which will really help the looks. I’ve now gotten both the anchor rollers properly in place. So, yeah, it looks a little odd, but strong! It’s very pointy right now, but once the furlers are in place, the snubber fairlead shackled on, etc., I think it’ll look at little less agro. Of course, at some point I’d like to add a proper pulpit/railing out there… But I’m done spending money on metalwork for awhile!
 After examining the bulkheads in the boat, I’ve determined that they were originally all painted. Some previous owner must have preferred the look of wood, and scraped/sanded 99% of the paint off, revealing some nice teak face-veneer under it.
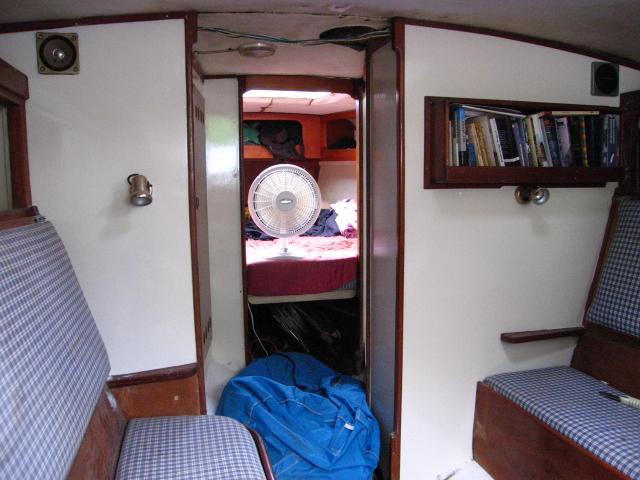 I like wood inside boats, but let’s be here: small boat+plenty of dark wood=living in a cave. The veneers are nice teak, but I wanted to re-apply paint. Besides, the screw holes of the original construction had been filled for paint instead of plugged as they would have been for a “bright” finish.
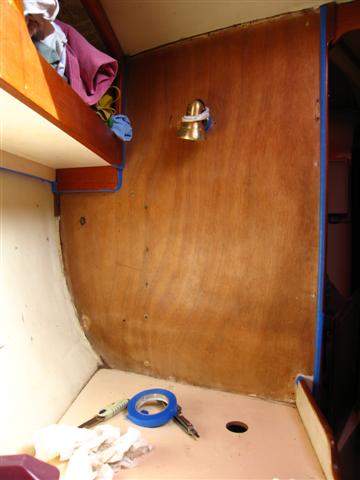 Knowing I didn’t need a veneer-perfect surface, I happily bored away for new screws where needed, and filled with epoxy filler and nitrostan under the paint. Simple. I used EasyPoxy for the coating; 2-3 coats of their white undercoater as needed, then two coats of Off-White gloss. This is a one-part linear polyurethane; mid-range for an exterior paint, but utterly bomb-proof as an interior paint.
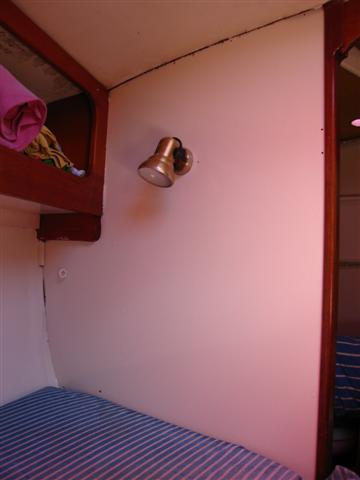 The primer really fills the grain, providing “hide”, and the gloss flows out very well thinned 10-20% with mineral spirits. That percentage sounds really high, I know, but here in the tropics, with the crazy heat and humidity, you need all the help you can get. This way, even hack painters like myself can avoid brush marks.
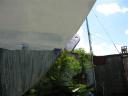
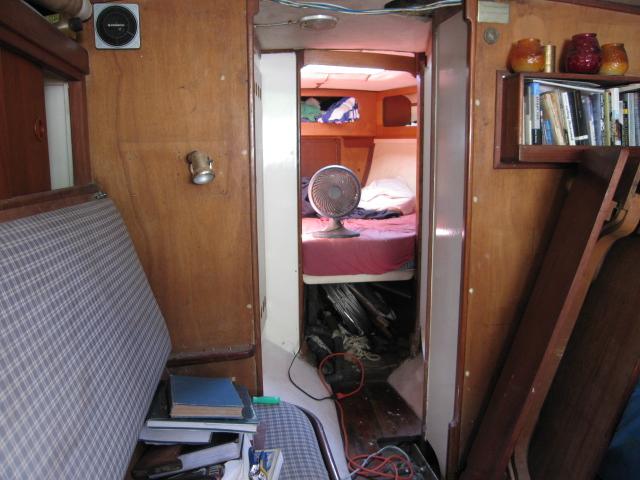
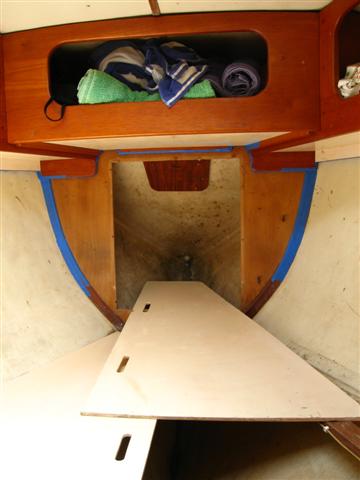 These are, obviously, before-and-after pics, showing the main salon and V-berth area. I have since painted the galley faceframes and aft salon bulkeads as well. The new starboard quarterberth area has also been painted, and the nav-station is primed. I’ll wait until the rest of the nav station is back in place before finishing the topcoats there.
 As you can see, it makes a huge difference! There is still plenty of solid teak trim around the bulkheads, as well as all teak panels behind the settees and as locker doors.
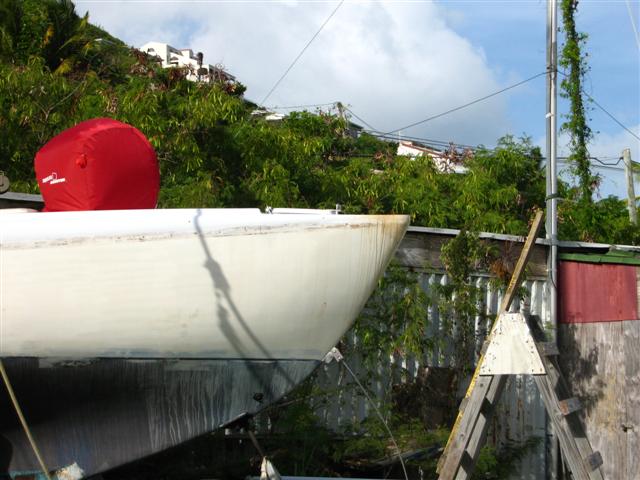


Recent Comments